Showing posts with label technique. Show all posts

Friday, 19 February 2016

Mixed Media fun with elephants

Hello and welcome!

I have to tell you I am WAY behind my "do some wonderful art time-Schedule" because the weekend to weeks ago we were away at the mountain skiing, And then monday my litle sweetie get sick (this stumic thing we Norwegians called omgangssyke) and then me and my husband get sick.... you know - the hole week in bed or sofa doing nothing. So last weekend my brother and my father and stepmother came visiting to celebrate litle Amalie three-years day. And  now, this days we renovated kitchen and living room.... ☺and Saturday (tomorrow) we get visitors again...

But today I had to have some quality time in my studio! And I want to show you something I've never done before. I was inspired my the loveley and talented Marta Lapkowska and do some Mixed Media, Scrapbooking, yeh!


I find some Scrappaper laying around in my studio. I think this sheet was very sweet with elephants and the fine sugar color. I started with some white gesso, then some Modeling paste trought a stencil just to get some texture.


I've used my heat tool to to get it all dry and then I took Dylusions Ink sprays in colour Bublegum pink and yellow and spritz ligtly over the modeling paste.


as you can see I've also used Vibrant Turquise Dylusions Ink spray to the piece


I  tore apart some other Design Paper, punching holes, hearts, flowers and stars using my punshers and my husband's hole punch.


I've used a stapler to gather all and then use my glue gun to glue it down.

Then I find my stash such as flowers beads, ribbons, cloth, etc.


I also had some lace curtain fabric lying around which I cut up and colored with light green fabric color


Then I stamped the elephant on a white cardstock and the thread stamp around the edges. I used another stamp to get stitches above the thread.


I stamped the phrase "An elephant never forget" on a napkin I've been decorated earlier then glue it on a white cardstock.


The rest of the phrases I just stamped on white cardstock with pink and silver ink, and cut it out with my scissors


Then I glue it all down on my scrappaper with my heat glue tool and glue pads.

Here is some close ups for details


I hope you enjoyed my tutorial. I really had a good time making this. Not only it was very cozy to make, I even got to use a little of everything of my stash that has been laying around, and some recycling.


All the stamps I've used comes from the online store Rubber Dance Stamps, except the stitch stamp and the sentence "Thank you".

I want to thank Marta Lapkowska for giving me so much inspiration ♥
Next time I will show you my studio/Craft room and a wonderful piece of art using Magicals among other  - also inspired by Marta ☺

I joining the fun over at Creative Carte Blanche which has a challenge this month called "Try Something Artistic You've Never Done Before!" (after a tip from lovely Marjie Kemper ☺Thank you Marjie! ♥)

Hope to see you again! Thank you for visiting.

Hugs, Anita
♥

Monday, 21 December 2015

Christmas gift tag in a jiffy.

Hello and welcome my beautiful and creative friends.

I've made some Christmas gift tags that I will show you now just before the day before the day. These are very simple and quick to make. So if you suddenly discover that you do not have labels for Your Christmas present, you can easily make them yourself in a Jiffy,


These I first groomed with gesso then I used my brayer with green and turquise and blue achrylic Paint on my Geli plate and made some pattern, and printet my tags.


On the other side i've used Pink, Gold and Purple colour and print them.

When both sides were dry I stamped Merry Christmas and a design on one side, while the other side, I will use to write To and From.

All stamps I have used here comes from Rubber Dance. You can buy these, and many more in Rubber Dance's online store. Just remember to use the code Anita2015 and you will get 15 % discount on your entire purchase. 

Since it is now just before Christmas, I wish to take this opportunity to
wish you all a perfectly wonderful Christmas
and a wonderful New Year!

I hope to see you again next year. In the mean while please visit Rubber Dance Scandinavian blog and check out my post tomorow, 22. December about a Christmas Tag, and my tut. on Tuesday 29. December -There will be an Art Journaling going on...


Take care of yourself and take care of each other ♥ Life is fragile ♥


Big and warm wishes and hugs
Anita ♥


Saturday, 21 November 2015

Flower Power - A tribute to Mimi Bondi

Hello and welcome

today the winter has arrived to Norway and my hometown Bergen. When I get up this morning the temperatur was about -1c (minus one celsius). Thats cold! But at least we have sunshine in Bergen and that's the great part ☺

Anyway, I am reading the fantastic book of Mimi Bondi from the Sunny side of life: "No shenanigans". Do you remember me getting the book? I told you about it on my previous blog post. You can see the blog post here


I have chosen one of her wonderful artwork and gone step by step and made this:


I just love these flowers and the intense colours. This is my preliminary favorite painting!

It's a bit odd to make warm flowers when it's winter out here ☺

I think it was absolutely gorgeous. Thank you so much, Mimi for your fantastic tutorials and inspiration. I must also say that I think it was very nice to read the book too. Many good tips and humor. I would recommend anyone to buy this! Yes, it was the current advertising *LoL*.

Thats all for today, folks. I will soon come back with more. Make sure to stay tuned ☺

Hugs, Anita
♥

Sunday, 13 September 2015

Four seasons, four techniques - four canvas


Helo and welcome
This post I had in Norwegian at the Scandinavian Rubber Dance blog September 6., and to the extent that my English speaking readers want to read about the four techniques I have used, I just post it here for you as well.

I started with four small stretched canvas size 10 cm x 10 cm. Prepared with the Gesso - except the one that I should use Pan Pastel on.

Canvas 1 - Spring - dare to - this is the hope season - heart means hope, love - Dare to ......
Here I used color combination from May, which was yellow, pink and purple. Used Embossing stamp and stamped the background and colored into this with Pan Pastel colors in purple, pink and yellow. Then I stamped the heart on a tissue paper, tore around it and glued it on the canvas with Mod Podge. The same I did with the sentence; Dare to.


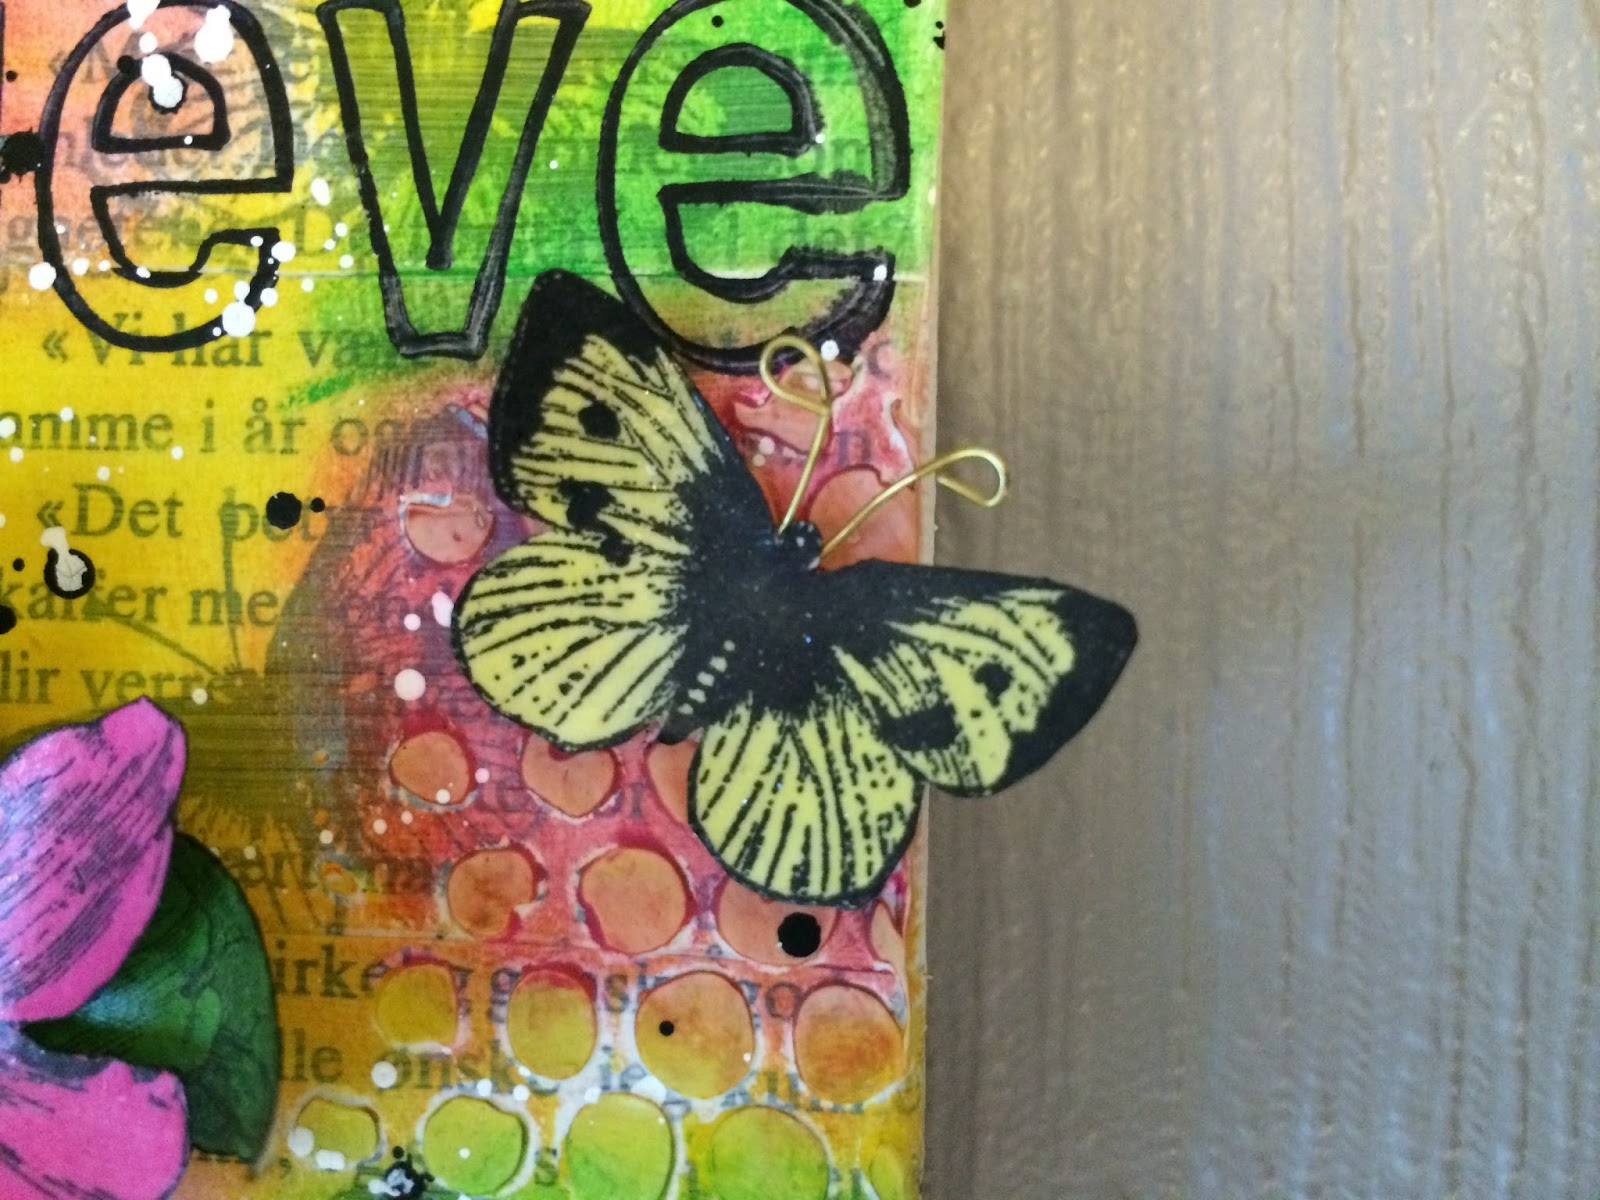
 Canvas 2 - Summer - Believe - summer, we can believe in everything - it's summer, there is sun, there is bright evenings.Here I stamped the cute little butterflies around on a page of an old book I had lying around. Clip looked routes and glued them on the canvas with modge Podge. Then I stamped the flower with Archival ink on paper, cut out the flower and leaves separately and colored leaves green with Distress Ink and flower with pink Distress ink color. When this was dry I painted Glimmer Structur Ice with a small brush on both the flower and the leaves - then they got a very nice, shiny polished look. I decided to bring a yellow butterfly and also did  the same steps with the butterflies like the flower.
 
Meanwhile canvas dried and I could apply some washed gesso over the entire canvas. Washed gesso = gesso mixed with water so that it becomes a lean mixture. Took a bubble-stencil and modeling paste and applied a little down and the right edge of the canvas. This is to get some volume in the image. This I let dry long before I took up my gelatos and dyed canvas to August colors were pink, yellow and green. After this was dry, I  stamped the word Belive right up on the canvas. Flower and butterfly were glued on with such a small adhesive pad. In addition, I made two small feelers on the butterfly with brass wire and glued them on with Instant glue. I also used black and white Posca pen to create some effect on the image.


Canvas 3 - Autumn - Dream - then we can dream about the summer that was or coming spring. Autumn is the dream season.Here used color combination for September which was mustard, red and dark orange. I began by pasting on a design sheets in a light brown color with modge Podge. Then sealed everything with modge Podge and let this dry. I used the heat gun to dry it. So I used a technique which is called Peeled Paint. Spent some Vaseline patchy around and painted so with the dark red acrylic paint. Dried thoroughly with my heat gun, took a wet wipe and dried over canvas - gently. So I took more Vaseline around and painted with the dark orange color. Dried and washed off with wet wipe. You can do this as many times as you like, but I stopped there because I would only use colors for september. Stamped word dream (from kit "Affirmations"), crown deer and some cones on the canvas with Archival ink.

A little tip if you use paper design in a thick  version - it becomes more manageable if you spray some water on it and then roll it back and forth with your hands. You preparing the fibers so the paper become more manageable to work With.

Canvas 4 - winter - Wish - you may wish that it will soon be Christmas, you may want something special for Christmas, or you may wish it was summer.....
Here I used the technique of newsprint. Tore out a page in Bergens Tidende (my local newspaper) and leave it on my workbench. Swabbed on gesso throughout. Dried properly and then I sprayed with Dylusions Ink Spray, with colors for December as was pink, purple and turquoise. Showered some water over and rolled over with a paper towel roll and dried with heat gun. It was absolutely beautiful colors - as you can see on the Picture below.


I tore off a suitable bit so I got with all the colors and glued the piece on the canvas with modge Podge. Dried. Stamped the word Wish and some snow crystals with Distress Ink in color Stormy Sky. Secondly, I painted snowpaint (when it dries it looks like snow). And so I stamped snowman on. As you can see was not the totally perfect, but it does not matter because I have made a snowman from before that I should just paste on top. Thus, the Stamped snowman just a shadow of himself ... :-)
I took my black Distress marker and drew up the arms of the snowman, so they appear a little better. Then I glued the snowman with double sided tape.
The snowman I have stamped on one side of an old book. Dyed with two-tone turquoise in Distress Ink and the hat in a purple color, the carrot I dyed with orange Stampers Big Brush Pen and so I cut it out. I think the snowman is absolutely beautiful.


This was my interpretation of the four seasons, four color combinations and four techniques. I hope you enjoyed my small canvas and  that I gave inspiration. Below is a small selection closeup of some details.


 If you have any questions please write questions in the comments below and I'll be glad to respond to you.


All the stamps that are used you can buy in online store Rubber Dance. Below is a list of links to all of the stamps I've used in this Project:
On the Canvas Spring I used: Arty Hearty og Affirmations     
On the canvas Summer I used: Antique Botanicals og Affirmations
On the canvas Fall and Winther I used: Frosty Friends og Affirmations

I hope you enjoyed my four seasons and you will soon come back and visit me.

Hugs,
Niti/Anita
<3

Sunday, 6 September 2015

Sneak peek - four season four techniques on canvas

Good morning my beautiful shiny friends

I just popin' by to  make you aware of my post over at Rubber Dance Scandinavian blog where I show step by step four canvas with four seasons and four techniques.

Come on over at Rubber Dance Scandinavian blog and take a look. Here is a sneak peak:


I will soon come back and show your more fun and creativity. Make sure you stay tuned :-)

Please give me a comment below if you have any question and/or if you just want to say Hello.

Hugs,
Niti/Anita
<3


Wednesday, 26 August 2015

Ticket please - metal in my Art Journal - step by step

Hi and welcome
I think I am in a flow these days. I keep on bursting of all creativity and ideas for new stunning artwork - hihi..... But it is a lovely feeling and I am so pleased that I have the opportunity to make art. And I hope I inspired others to do the same.

Today I'll show you my Art Journal page that was inspired by the Metallica concert me and my husband was on last Thursday in my hometown Bergen in Norway. I hope you know Metallica....If you don't I can briefly tell you that Metallica is an American heavy metal band formed in Los Angeles, California. Metallica was formed in 1981 when vocalist/guitarist James Hetfield responded to an advertisement posted by drummer Lars Ulrich in a local newspaper.
Metallica has been listed as one of the greatest artists of all time by many magazines, including Rolling Stone, which ranked them 61st on its list of The 100 Greatest Artists of All Time. So now you know a little of Metallica :-)

I'm in for the Challenge Ticket Please over at Simon Says Stamp. Here is the link to the site: http://www.simonsaysstampblog.com/mondaychallenge/?p=2986

And here is my Metallica inspired Art Journal Page - With my ticket as a part of the art:


I love going to concerts and I'm sure we went for about four or five concerts each year both at home and abroad. Now in September we travel to Stocholm and experience U2 in "Globen", than in november this year it'ss Melody Gardot in Grieghallen in my home town. Earlier this year we experience Ryan Adams, also in my home town. Oh, Lucky me :-)

But now over to my newest page in my big Art Journal from Dylusions. I startet with the background - off course ;) Since the colour of the metal band Metallica is for the most, black, grey, blue, white and gold I og for these five colours on my page. I painted With a brush acrylic Paint and scrub over it With a tongue brush when the Paint where still wet, and use a note stamp to stamp notes here and there.
 
Then I grab my new stencil from Dina Wakley and used black and white acrylic paint and stab the paint on with a mini blending tool from Ranger. I also used a stencil called Dot Fade from Tim Holtz collection. Then I stamped some basic background from Dylusions and the Memoirs stamp from Rubber Dance.   In addition, I stamped notes with gold acrylic Paint.
 
 
I took a Tag and and used it to wipe up the rest of the paint on the workbench so I cut it and stamped notes With gold acrylic Paint, and the Collage Elements I stamp from Rubber Dance and I used the blending tool With Distress Ink black soot around the edge.

 
The guitars and lyrics I found on the internet. And of course the ticket it's my own that I used on Thursday at the Metallica concert. It was a very good concert. Very good music and very good atmosphere :-)
 
Here is some close ups:


Here is the final result. I am very pleased with it. I hope you enjoyed it and that I gave you some inspiration.


Let art meet art <3
 
Hope you will give me a comment just so I know you're out there :-) And please come and visit me again soon.
 
Hugs, Niti/Anita
 
oh, I almost forgot - I paintet the letters in Metallica with gold acrylic paint. Just so you know it :-)