Showing posts with label Design Team. Show all posts

Friday, 15 July 2016

Sprøe fugler med spreke farger

Heisann dere,

i dag tenkte jeg at jeg skulle skrive på mitt morsmål, som er norsk. Det er egentlig mest fordi jeg i dag har laget en liten inspirasjon for Hjerteboden. Hjerteboden er en norsk hobby butikk og i dag har jeg altså gleden av å vise det jeg har laget ved hjelp av produkter man kan få kjøpt i nettbutikken til Hjerteboden.


Dette er en Manilla Tag i størrelse #10.

Jeg begynte med å påføre litt farge i bakgrunnen med Distress Ink - Broken China, Dusty Concord og Wild Honey.
Dernest fant jeg frem stencilen fra Tim Holtz som heter Holiday Knit og laget litt mønster her og der med Distress Ink i fargen Seedless Preserves.

Jeg stemplet Crazy Birds på en ny Manilla Tag, fargela disse med Distress Ink, klippet ut og limte på Tagen min. Jeg stemplet først fuglene på tagen for å få med alle detaljer, som de søte små føttene og krøllen på halen og håret før jeg da limte på de utklipte fuglene.


Rundt kanten av tagen brukte jeg Distress Ink i fargen Gathered Twigs. Jeg tok litt vann i hånden og knipset dråper litt her og der på tagen. Jeg limte på Observations, samt knyttet et bånd i hullet på toppen. Og voila der var tagen ferdig. Denne kan jeg selvsagt bare ha sånn som den er eller jeg kan velge å lime den inn i min Art Journal som en del av noe annet. Alt er mulig.

Håper du likte tagen min og at jeg ga deg litt inspirasjon til å lage noe du også. Husk å bli med på månedens utfordring over hos Hjerteboden bloggen som denne måneden er "Alt er lov".


Tusen takk for at du stakk innom! Med ønske om en riktig god sommer ☺

Klem fra Anita
♥

Saturday, 28 May 2016

Mushroom in my heart - Art Journal page

Hello and welcome!

Today I want to tell you about Mushrooms.

I looooove mushrooms! So when I was lucky to got these amazing mushrooms stamps from Rubber Dance with Helen Allen's wonderful tutorials was there is no doubt at all - of course I would try the tutorial 7 in the video accompanying Rubber Dance's Mushroom stamp set. The tutorial from Helen Allen is a very detailed and pleasing step by step video that not only shows you how to get the given result, but she also comes with tips and tricks along the way that you can use on other projects as well. Along with stamp set and the video you also get a list of what you need to create the same projects. There are a total of 10 videos in which she deals with, among other cards, art journal pages and a mini bok.Take a look at the intro video which I've linked below so you get a little more information about what you get if you buy this stamp kit with videos. It is definitely worth the money!
This was so much fun that I actually had to make two Art Journal pages in two different books. The one I made after Helen Allen's tutorial step by step bothcolor and text. The second that I made, I've used some other colors, as well as another text which I have written with my Fineline Applicator in Norwegian.

I also have a blog post today over at Rubber Dance Skandinavian blog where I also write about mushroom - in Norwegian. You can hop over and check it out here.


The Mushroom stamp set and 10 video tutorials can be purchased both at Helen's Etsy Shop and on Rubber Dance Stamps website, and there are links to both below, There is also a link to Helen's intro video.


That was all for now folks, I hope to see you again soon. Have a wonderful and creative day!

Hugs, Anita
♥

Monday, 2 May 2016

Mushroom stamps into beautiful flower cards

Hello and welcome

Helen Allen and Rubber Dance Stamps have made a fine collaboration with video and stamp set and I've been so lucky to get the oportunity to try them out.

I promise you it's a really good video instruction with suggestions for sizes and material list on what you can chose to make. Helen Allen have also a lot of tips and tricks you may not have tought about before. I have certainly learned a lot by watching her tutorials. In addition she is very comfortable to listen to and she have a great sense of humor.

I've chosen tutorial 10 and made these three cards following Helen Allen's instructions step by step.  I think they turned out qouite nice. What do you think?


And here is the inside of the cards:


The Mushroom stamp set and 10 video tutorials can be purchased both at Helen's Etsy Shop and on Rubber Dance Stamps website, and there are links to both below.
There is also a link to Helen's intro video


Thank you for visiting. I wish you a very nice and creative day!

Hugs, Anita
♥


Sunday, 13 September 2015

Four seasons, four techniques - four canvas


Helo and welcome
This post I had in Norwegian at the Scandinavian Rubber Dance blog September 6., and to the extent that my English speaking readers want to read about the four techniques I have used, I just post it here for you as well.

I started with four small stretched canvas size 10 cm x 10 cm. Prepared with the Gesso - except the one that I should use Pan Pastel on.

Canvas 1 - Spring - dare to - this is the hope season - heart means hope, love - Dare to ......
Here I used color combination from May, which was yellow, pink and purple. Used Embossing stamp and stamped the background and colored into this with Pan Pastel colors in purple, pink and yellow. Then I stamped the heart on a tissue paper, tore around it and glued it on the canvas with Mod Podge. The same I did with the sentence; Dare to.


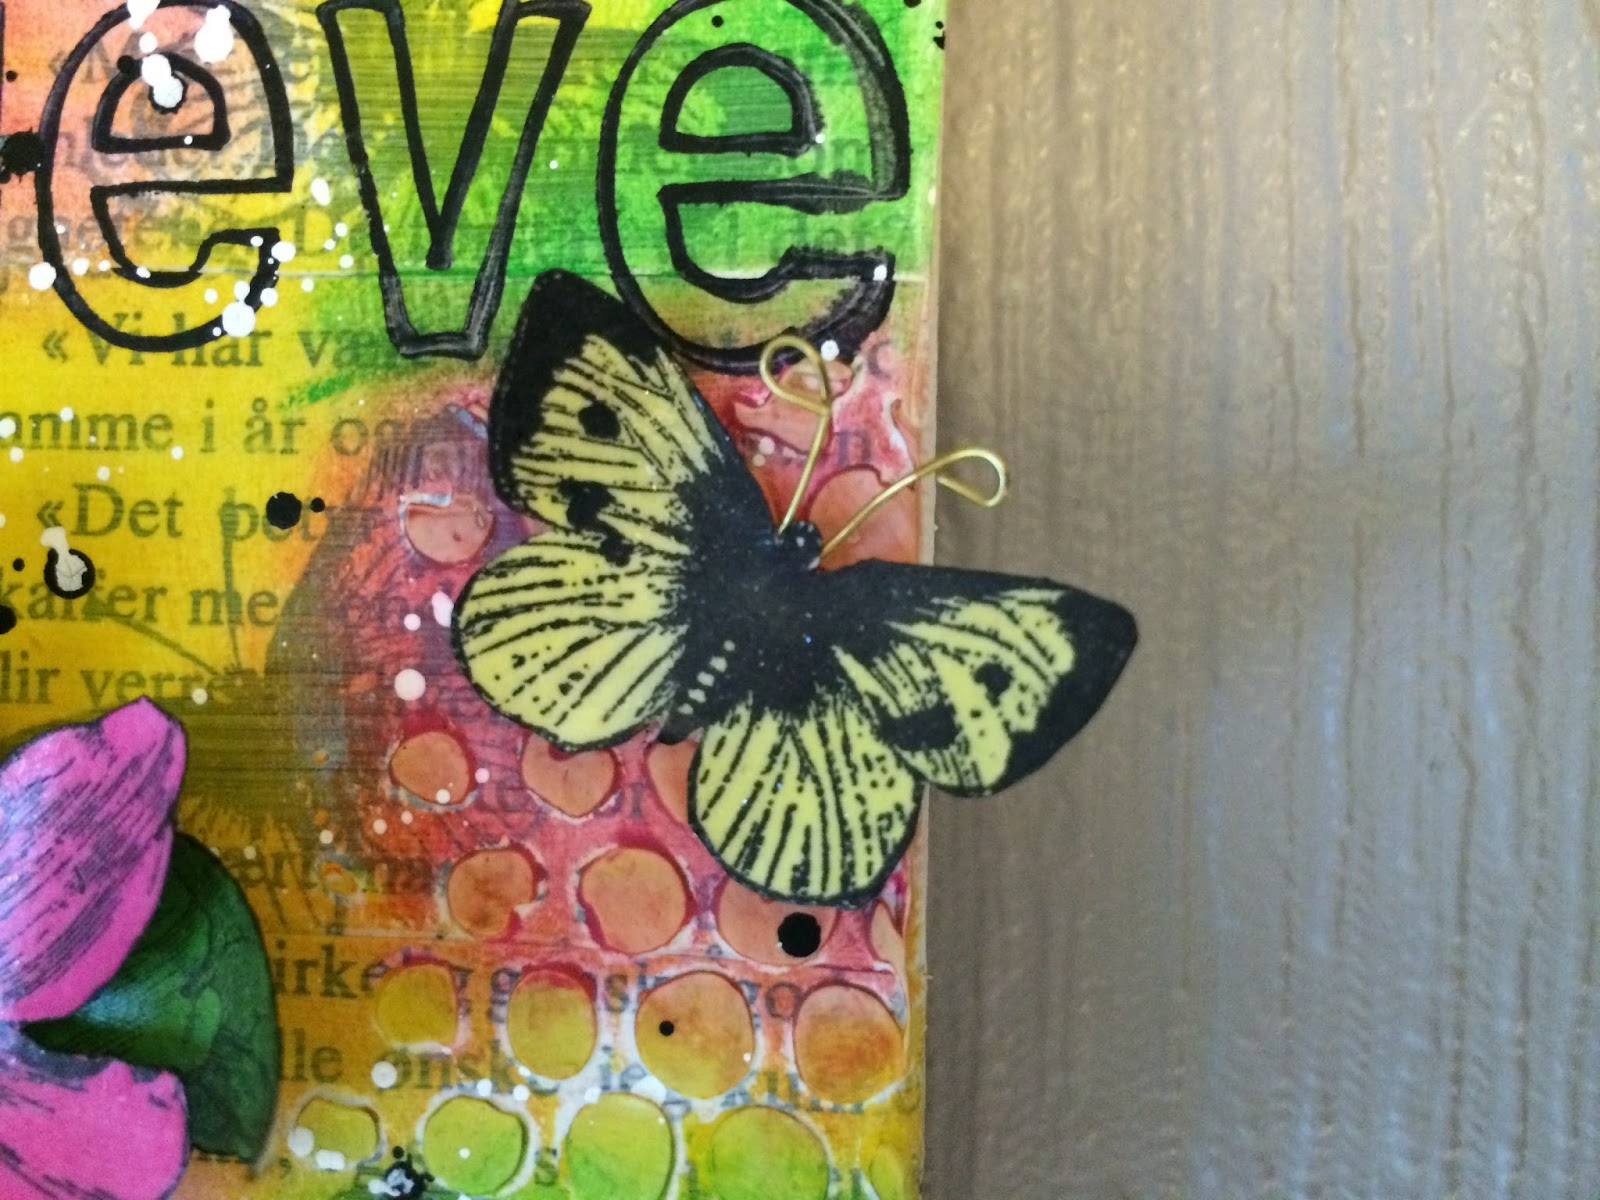
 Canvas 2 - Summer - Believe - summer, we can believe in everything - it's summer, there is sun, there is bright evenings.Here I stamped the cute little butterflies around on a page of an old book I had lying around. Clip looked routes and glued them on the canvas with modge Podge. Then I stamped the flower with Archival ink on paper, cut out the flower and leaves separately and colored leaves green with Distress Ink and flower with pink Distress ink color. When this was dry I painted Glimmer Structur Ice with a small brush on both the flower and the leaves - then they got a very nice, shiny polished look. I decided to bring a yellow butterfly and also did  the same steps with the butterflies like the flower.
 
Meanwhile canvas dried and I could apply some washed gesso over the entire canvas. Washed gesso = gesso mixed with water so that it becomes a lean mixture. Took a bubble-stencil and modeling paste and applied a little down and the right edge of the canvas. This is to get some volume in the image. This I let dry long before I took up my gelatos and dyed canvas to August colors were pink, yellow and green. After this was dry, I  stamped the word Belive right up on the canvas. Flower and butterfly were glued on with such a small adhesive pad. In addition, I made two small feelers on the butterfly with brass wire and glued them on with Instant glue. I also used black and white Posca pen to create some effect on the image.


Canvas 3 - Autumn - Dream - then we can dream about the summer that was or coming spring. Autumn is the dream season.Here used color combination for September which was mustard, red and dark orange. I began by pasting on a design sheets in a light brown color with modge Podge. Then sealed everything with modge Podge and let this dry. I used the heat gun to dry it. So I used a technique which is called Peeled Paint. Spent some Vaseline patchy around and painted so with the dark red acrylic paint. Dried thoroughly with my heat gun, took a wet wipe and dried over canvas - gently. So I took more Vaseline around and painted with the dark orange color. Dried and washed off with wet wipe. You can do this as many times as you like, but I stopped there because I would only use colors for september. Stamped word dream (from kit "Affirmations"), crown deer and some cones on the canvas with Archival ink.

A little tip if you use paper design in a thick  version - it becomes more manageable if you spray some water on it and then roll it back and forth with your hands. You preparing the fibers so the paper become more manageable to work With.

Canvas 4 - winter - Wish - you may wish that it will soon be Christmas, you may want something special for Christmas, or you may wish it was summer.....
Here I used the technique of newsprint. Tore out a page in Bergens Tidende (my local newspaper) and leave it on my workbench. Swabbed on gesso throughout. Dried properly and then I sprayed with Dylusions Ink Spray, with colors for December as was pink, purple and turquoise. Showered some water over and rolled over with a paper towel roll and dried with heat gun. It was absolutely beautiful colors - as you can see on the Picture below.


I tore off a suitable bit so I got with all the colors and glued the piece on the canvas with modge Podge. Dried. Stamped the word Wish and some snow crystals with Distress Ink in color Stormy Sky. Secondly, I painted snowpaint (when it dries it looks like snow). And so I stamped snowman on. As you can see was not the totally perfect, but it does not matter because I have made a snowman from before that I should just paste on top. Thus, the Stamped snowman just a shadow of himself ... :-)
I took my black Distress marker and drew up the arms of the snowman, so they appear a little better. Then I glued the snowman with double sided tape.
The snowman I have stamped on one side of an old book. Dyed with two-tone turquoise in Distress Ink and the hat in a purple color, the carrot I dyed with orange Stampers Big Brush Pen and so I cut it out. I think the snowman is absolutely beautiful.


This was my interpretation of the four seasons, four color combinations and four techniques. I hope you enjoyed my small canvas and  that I gave inspiration. Below is a small selection closeup of some details.


 If you have any questions please write questions in the comments below and I'll be glad to respond to you.


All the stamps that are used you can buy in online store Rubber Dance. Below is a list of links to all of the stamps I've used in this Project:
On the Canvas Spring I used: Arty Hearty og Affirmations     
On the canvas Summer I used: Antique Botanicals og Affirmations
On the canvas Fall and Winther I used: Frosty Friends og Affirmations

I hope you enjoyed my four seasons and you will soon come back and visit me.

Hugs,
Niti/Anita
<3

Sunday, 6 September 2015

Sneak peek - four season four techniques on canvas

Good morning my beautiful shiny friends

I just popin' by to  make you aware of my post over at Rubber Dance Scandinavian blog where I show step by step four canvas with four seasons and four techniques.

Come on over at Rubber Dance Scandinavian blog and take a look. Here is a sneak peak:


I will soon come back and show your more fun and creativity. Make sure you stay tuned :-)

Please give me a comment below if you have any question and/or if you just want to say Hello.

Hugs,
Niti/Anita
<3


Sunday, 2 August 2015

Because I'm Happy - Me, the thrilled member of a marvelous Design Team


Helo you Sweeties


It’s Sunday today, but it’s not just only a Sunday, it is a very special Sunday for me. It’s now official that I’ve become a very proud member of the Rubber Dance Skandinavian Design Team J And I’m just overthrilled. This is a dream come true.


Not only do I get the opportunity to show my artistic skills, but I get in addition allowed to become acquainted with many wonderful artistic people around the world. Where we can both support, encourage, and last but not least, inspire each other. No wonder I’m happy :-)


You can read more about Me, Rubber Dance, Bibi (the big Boss and the Designer and Developer of the beautifull Rubber Stamps), and all the other remarkable Design Team members here


And to celebrate the good things I've just made this marvelous piece of art - if I do say so myself :-)


This background is a bit special. I have used clingfilm from the kitchen. The technique is simple but ingenious, and I just loooove the result.


This time I just used stamps from Rubber Dance. You can find and buy all the stamps I have used and even more fantastic rubber Stamps here

I realy do hope you want to come back and visit me on my blog, cause here is a lot of inspiration and glory, and it's just getting better and better.

If you want a step by step tutorials, or/and want to know which equipment I used on this Art Journal page, please write me a comment and I promise you both answer you and also Publish a step by step tut on my blog. Just to make you happy :-)

Finally, I would just like to say a BIG THANK YOU to Bibi (the big Boss over at Rubber Dance) who have given me this opportunity. I am very glad that I have discovered you and your wonderful stamps. Must of course emphasize that you are also a very talented artist and a lovely human being.

Until next time - Be Happy and give the world a big happy SMILE!


Hugs, Niti/Anita x