Tuesday 22 September 2015

Tuesday's Tutorials


Helo and welcome
Today I have the honour of being featured over at Marjie Kempers Tuesday's Tutorials

http://marjiekemper.com/blog-series
The Journal Page that Marjie is featuring is below.
Thank you so much for the invite, Marjie!

Forglem meg ei
 
Hugs, Niti
<3

Thursday 17 September 2015

Good Day vs Bad Day - Art Journal

Hi and welcome
Long time no see. I've been away a lot lately. First I have been in Brussels together with my colleagues, then I have followed my oldest daughter in two days seminar on The multiple sclerosis for new diagnosed. But now I am here and and working on new ideas. Here is a sneak peek - work in progress :-)


I will soon come back and show you the final result of my Art Journal Page.
I hope you are doing well and that you have time to be creative.
 
Hugs, Niti
<3

Sunday 13 September 2015

Four seasons, four techniques - four canvas


Helo and welcome
This post I had in Norwegian at the Scandinavian Rubber Dance blog September 6., and to the extent that my English speaking readers want to read about the four techniques I have used, I just post it here for you as well.

I started with four small stretched canvas size 10 cm x 10 cm. Prepared with the Gesso - except the one that I should use Pan Pastel on.

Canvas 1 - Spring - dare to - this is the hope season - heart means hope, love - Dare to ......
Here I used color combination from May, which was yellow, pink and purple. Used Embossing stamp and stamped the background and colored into this with Pan Pastel colors in purple, pink and yellow. Then I stamped the heart on a tissue paper, tore around it and glued it on the canvas with Mod Podge. The same I did with the sentence; Dare to.


 Canvas 2 - Summer - Believe - summer, we can believe in everything - it's summer, there is sun, there is bright evenings.Here I stamped the cute little butterflies around on a page of an old book I had lying around. Clip looked routes and glued them on the canvas with modge Podge. Then I stamped the flower with Archival ink on paper, cut out the flower and leaves separately and colored leaves green with Distress Ink and flower with pink Distress ink color. When this was dry I painted Glimmer Structur Ice with a small brush on both the flower and the leaves - then they got a very nice, shiny polished look. I decided to bring a yellow butterfly and also did  the same steps with the butterflies like the flower.
 
Meanwhile canvas dried and I could apply some washed gesso over the entire canvas. Washed gesso = gesso mixed with water so that it becomes a lean mixture. Took a bubble-stencil and modeling paste and applied a little down and the right edge of the canvas. This is to get some volume in the image. This I let dry long before I took up my gelatos and dyed canvas to August colors were pink, yellow and green. After this was dry, I  stamped the word Belive right up on the canvas. Flower and butterfly were glued on with such a small adhesive pad. In addition, I made two small feelers on the butterfly with brass wire and glued them on with Instant glue. I also used black and white Posca pen to create some effect on the image.


Canvas 3 - Autumn - Dream - then we can dream about the summer that was or coming spring. Autumn is the dream season.Here used color combination for September which was mustard, red and dark orange. I began by pasting on a design sheets in a light brown color with modge Podge. Then sealed everything with modge Podge and let this dry. I used the heat gun to dry it. So I used a technique which is called Peeled Paint. Spent some Vaseline patchy around and painted so with the dark red acrylic paint. Dried thoroughly with my heat gun, took a wet wipe and dried over canvas - gently. So I took more Vaseline around and painted with the dark orange color. Dried and washed off with wet wipe. You can do this as many times as you like, but I stopped there because I would only use colors for september. Stamped word dream (from kit "Affirmations"), crown deer and some cones on the canvas with Archival ink.

A little tip if you use paper design in thick  version - it becomes more manageable if you spray some water on it and then roll it back and forth with your hands. You preparing the fibers so the paper become more manageable to work With.

Canvas 4 - winter - Wish - you may wish that it will soon be Christmas, you may want something special for Christmas, or you may wish it was summer.....
Here I used the technique of newsprint. Tore out a page in Bergens Tidende (my local newspaper) and leave it on my workbench. Swabbed on gesso throughout. Dried properly and then I sprayed with Dylusions Ink Spray, with colors for December as was pink, purple and turquoise. Showered some water over and rolled over with a paper towel roll and dried with heat gun. It was absolutely beautiful colors - as you can see on the Picture below.


I tore off a suitable bit so I got with all the colors and glued the piece on the canvas with modge Podge. Dried. Stamped the word Wish and some snow crystals with Distress Ink in color Stormy Sky. Secondly, I painted snowpaint (when it dries it looks like snow). And so I stamped snowman on. As you can see was not the totally perfect, but it does not matter because I have made a snowman from before that I should just paste on top. Thus, the Stamped snowman just a shadow of himself ... :-)
I took my black Distress marker and drew up the arms of the snowman, so they appear a little better. Then I glued the snowman with double sided tape.
The snowman I have stamped on one side of an old book. Dyed with two-tone turquoise in Distress Ink and the hat in a purple color, the carrot I dyed with orange Stampers Big Brush Pen and so I cut it out. I think the snowman is absolutely beautiful.


This was my interpretation of the four seasons, four color combinations and four techniques. I hope you enjoyed my small canvas and  that I gave inspiration. Below is a small selection closeup of some details.


 If you have any questions please write questions in the comments below and I'll be glad to respond to you.


All the stamps that are used you can buy in online store Rubber Dance. Below is a list of links to all of the stamps I've used in this Project:
On the Canvas Spring I used: Arty Hearty og Affirmations     
On the canvas Summer I used: Antique Botanicals og Affirmations
On the canvas Fall and Winther I used: Frosty Friends og Affirmations

I hope you enjoyed my four seasons and you will soon come back and visit me.

Hugs,
Niti/Anita
<3

Monday 7 September 2015

Make art out of a cleaning page

Hello and welcome, it's me again :-)

Today I just want to show you my Art Journal page made of "a cleaning page". It means that this background was created by leftover paint, stampinks and stencilspaint etc. that I cleaned after making other creations. I hope you understand what I mean :-)

So just because the background already was finished I've just used Dylusions Journal Block to make the board around the edge of the page, cut out something from a magazine, and stamped some images on a separate sheet and cut it out, glue it all down with my glue stick, some doodling here and there.
And voila this showed up:

I'm sorry, I don't remember ordening a glass of your opinion

I think the results were pretty good, what do you think?

Pleave me a comment if you have any questions.

I hope to see you soon - until then, take care and be creative.

Hugs, Niti/Anita
<3

Sunday 6 September 2015

Sneak peek - four season four techniques on canvas

Good morning my beautiful shiny friends

I just popin' by to  make you aware of my post over at Rubber Dance Scandinavian blog where I show step by step four canvas with four seasons and four techniques.

Come on over at Rubber Dance Scandinavian blog and take a look. Here is a sneak peak:


I will soon come back and show your more fun and creativity. Make sure you stay tuned :-)

Please give me a comment below if you have any question and/or if you just want to say Hello.

Hugs,
Niti/Anita
<3


Thursday 3 September 2015

To do list - step by step tut. - Mixed media canvas

Hi and welcome

Today is a shiny day here in my hometown Bergen in the world's most wonderfull country, Norway. And just because it is a shiny day I made a shiny canvas :-) This is a Mixed Media Canvas,
23 x 8 cm.

TO DO LIST: 1. Learning to fly
               2. Fly away
I began by glue on Tim Holtz's tissue paper on the entire canvas.


I painted with gesso over it, let it dry before I painted with Dylusions paint in the colors of turquoise, pink, green and orange using baby wipe.

 
Then I used a stencil and black Dylusions paint and painted the words To do list using Ranger Mini Ink Blending Tool.
 
 
I also used the stencil to apply the number 1 and 2, and so I used my black pen and wrote for freehand; Learning to fly and Fly away.


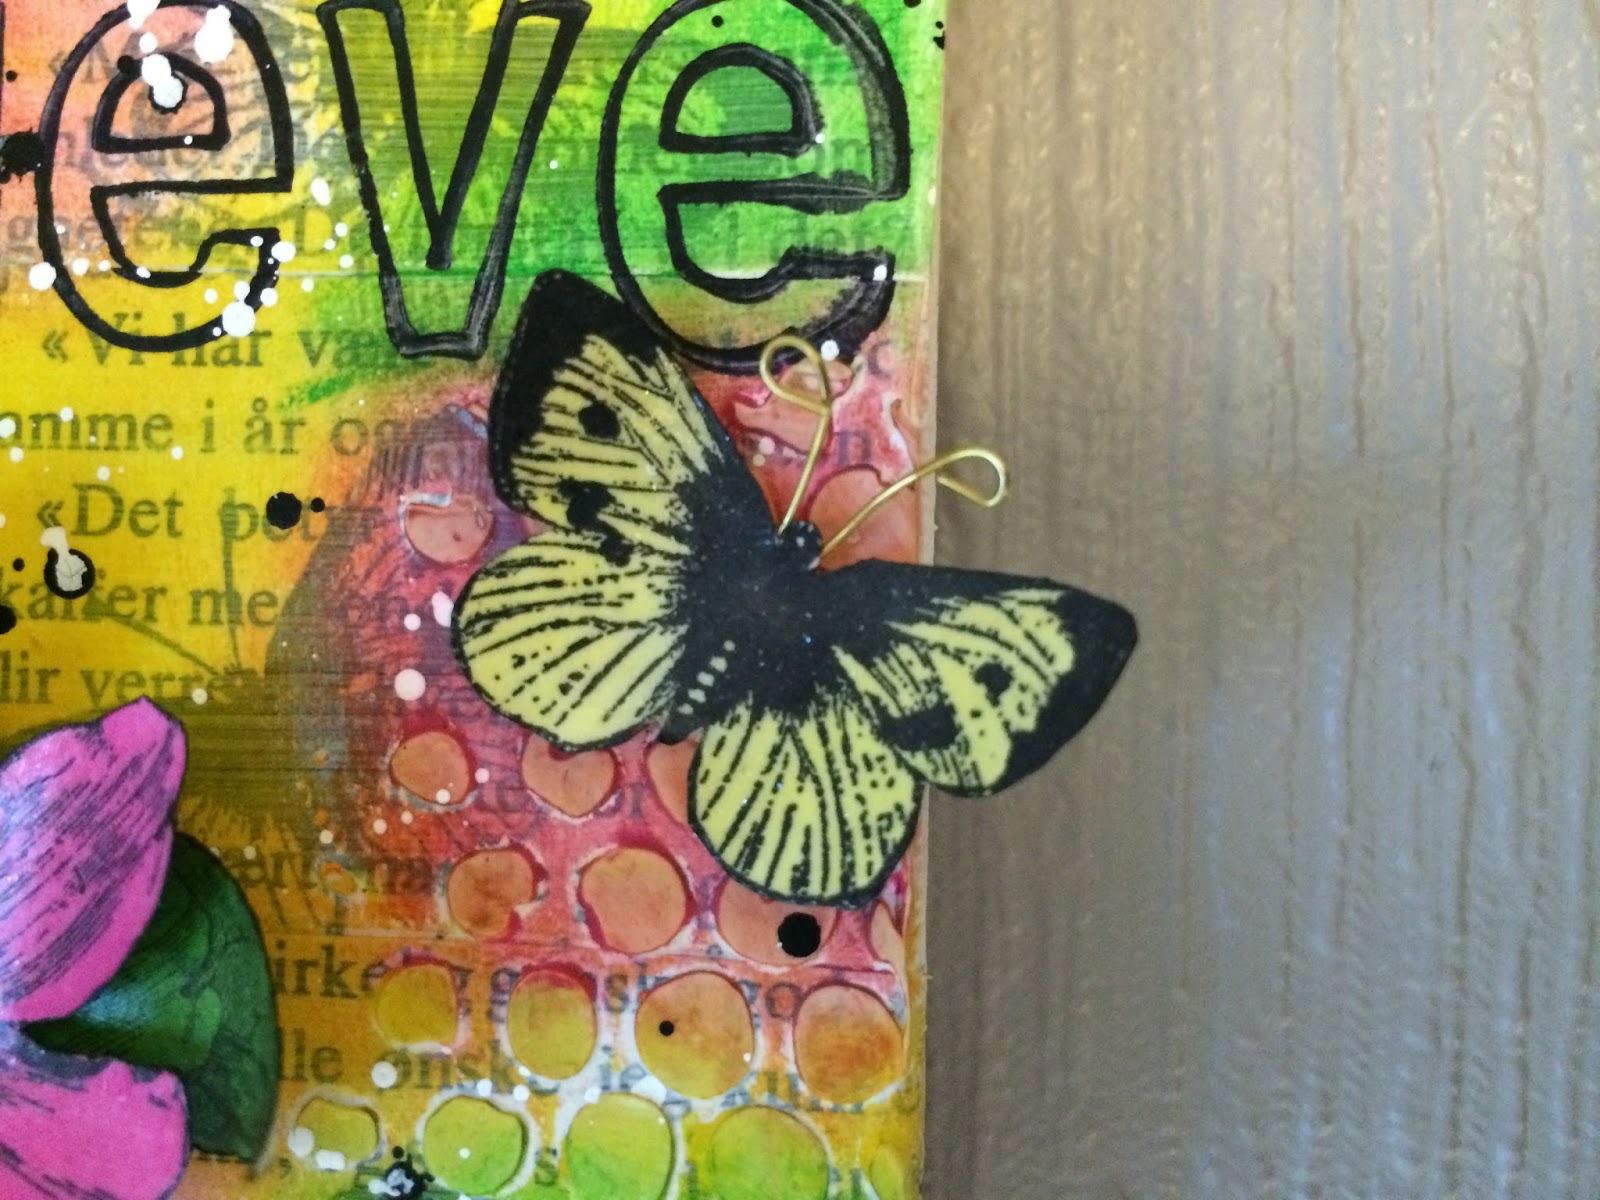
I stamped the gorgeous Rubber Dance butterflies on my homemade Design paper made from newspaper, gesso and Dylusions Ink. You can read more about my homemade design paper and much more in my post for Rubber Dance Skandinavian Blog now coming Sunday, September 6th. Be sure not to miss that post.
'
 Then I took a stencil called Dot Matrix and inflicted little dots here and there With a mini sponge.

 
 I also do some splattering on the canvas with my white Posca pen.

 
I applied Glitter Glaze on all the butterflies with a small brush and then placed them on the canvas with such 'small adhesive pads


Glitter glaze was simply ingenious, the butterflies got a lovely sheen.


I hope you enjoyed my To do list and that I gave you the inspiration to create some art, perhaps on canvas, in your Art Journal or maybe a card.

Please, write a few words to me so I know you're out there. All comments are appreciated.

Come back soon! I will. Until then - let your creative thoughts fly.

Hugs, Niti/Anita
<3